In this article we will explore a simple way of turning e-mail notifications into Microsoft Sentinel alerts. This automation works well in situations when a MSSP manages part of your organization’s security suite and notifies your SOC about significant alerts via e-mail.
Requirements:
You’ll need:
- predictably formatted e-mails (!)
- 1 Logic App
- 1 Outlook rule
- a simple parser written in KQL
- 1 analytics rule
High level overview:
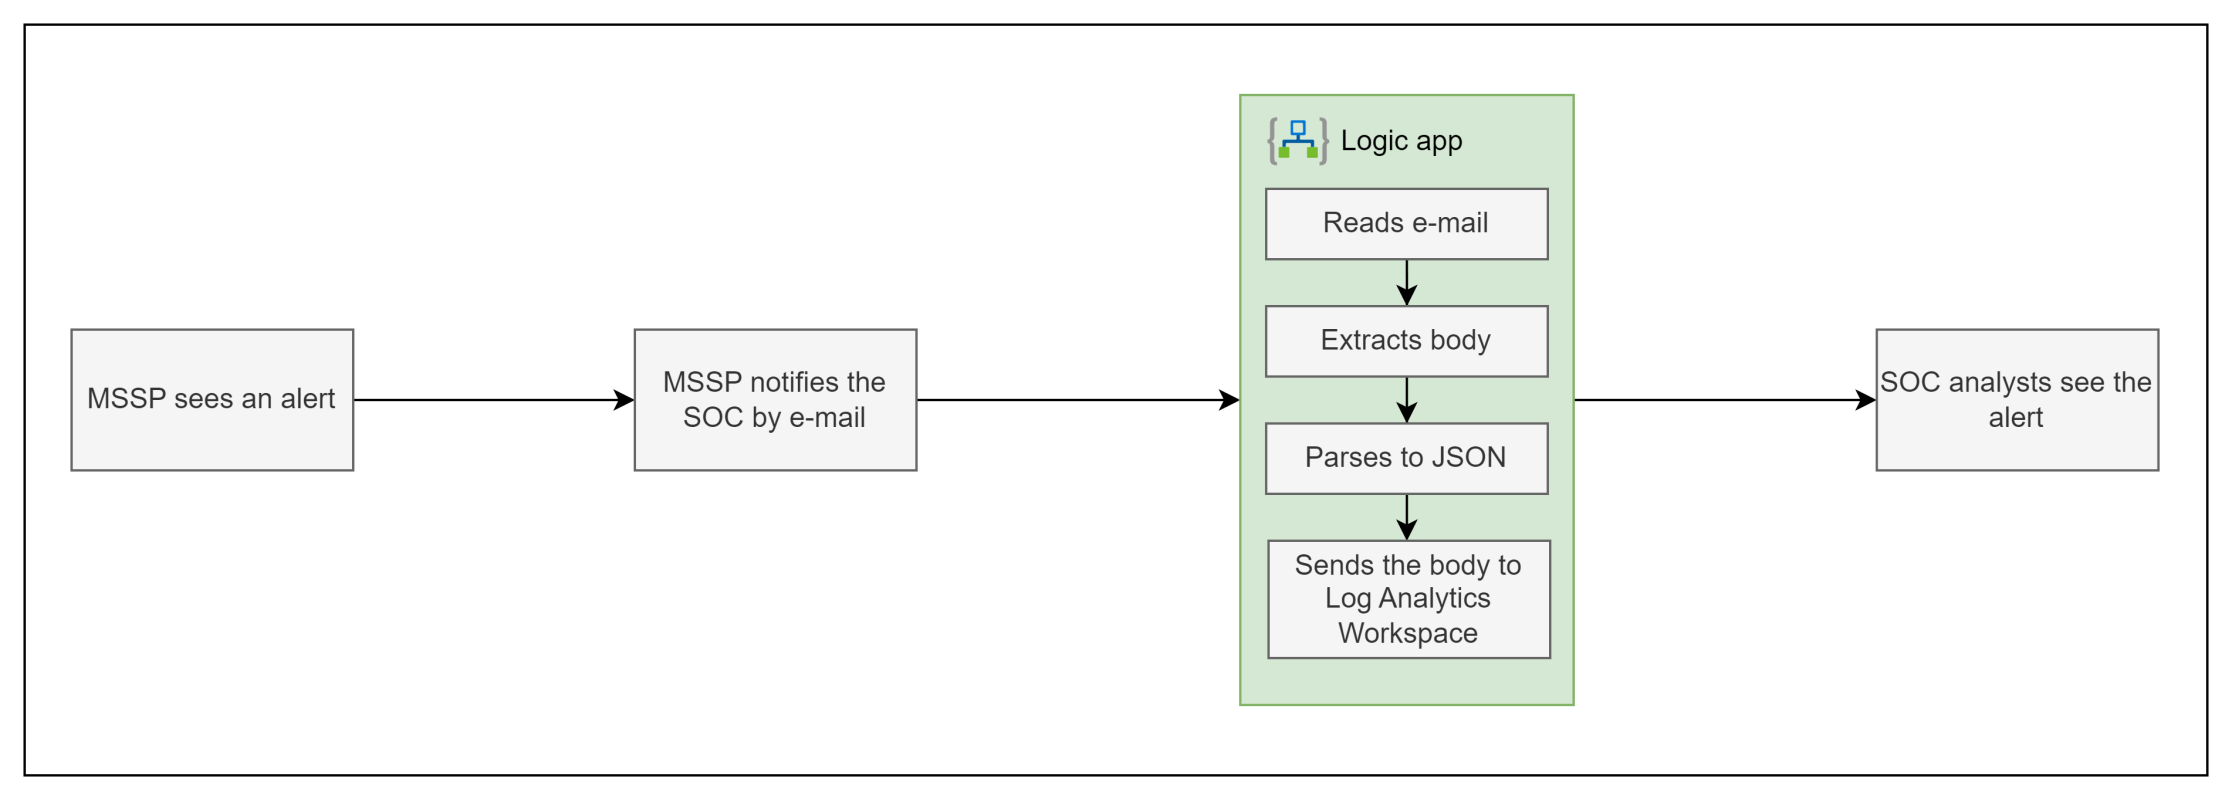
At a high level this automation:
- Reads an e-mail from a shared mailbox
- Converts body of the message from HTML to plain text
- Converts the text into a JSON object
- Sends the JSON object to the Log Analytics Workspace
Once the data makes it to the LAW you can write a simple parser in KQL and create an analytics rule that will then trigger alerts for your SOC to handle.
Outlook rule
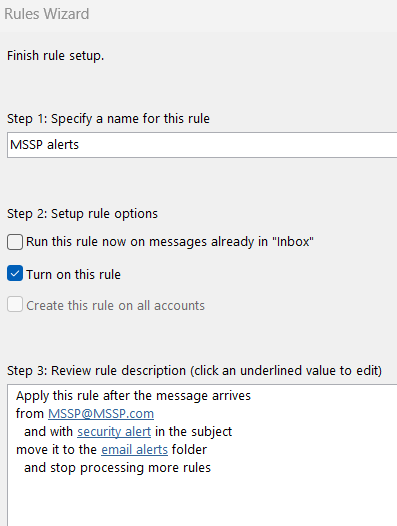
First we need to create an outlook rule that moves e-mail notifications to a specific folder. Go to your Outlook’s Rules Wizard and create a rule that looks like this:
- from: your MSSPs e-mail
- keyword: a common keyword that appears in title of messages from your MSSP, typically ‘alert’ or ‘security alert’
- destination folder: email alerts
Logic App: Connectors and triggers
After creating and testing that our rule works as intended we move on to creating a Logic App. Go to portal.azure.com and then type Logic apps in the search bar.
Pick a Subscription and Resource Group for the Logic app, name it in line with your naming policy (if you don’t have one I suggest this: https://learn.microsoft.com/en-us/azure/cloud-adoption-framework/ready/azure-best-practices/resource-naming) and select the ‘Consumption’ tier:
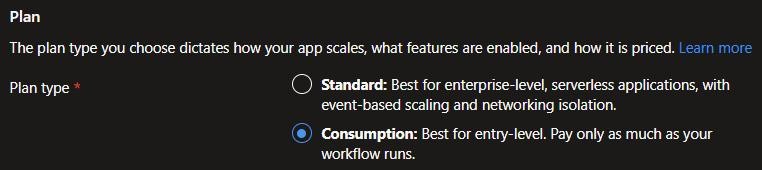
Select ‘Create’ and after a while your Logic App will be created.
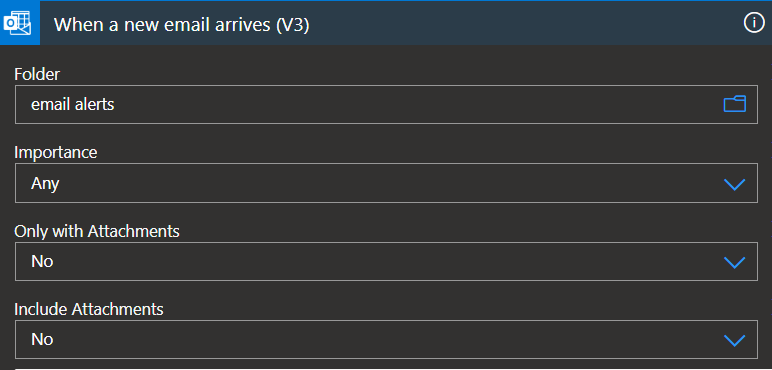
1. When a new e-mail arrives:
Configure the ‘Folder’ value to reference the outlook folder from the previous step, in our case it is ’email alerts’:
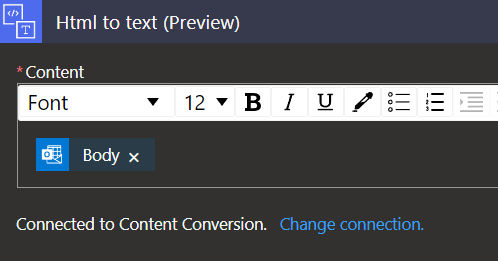
2. Content conversion – HTML to text:
In this step we convert the body of our e-mail message to a text value. To do so, we will use HTML to text action and pass the value of ‘Body’ from the first trigger:
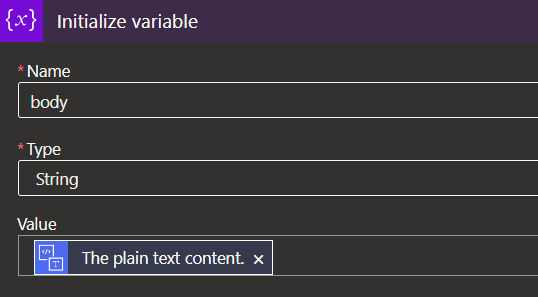
3. Variables – Initialzie variable:
Here we take the text converted in step 2 and create a string variable by using the ‘Initialize variable’ action:
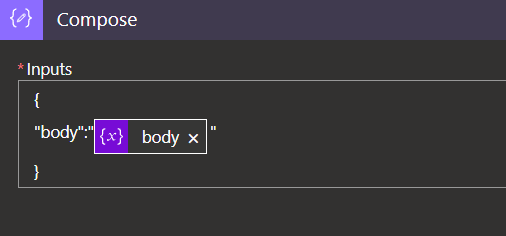
4. Data operations – Compose:
In this step we turn the ‘body‘ variable from the previous step into a JSON object:
5. Azure Log Analytics Data Connector – Send Data:
We are ready to send the data into a Log Analytics Workspace. Before we can do it, we need to prepare Workspace ID and Key:
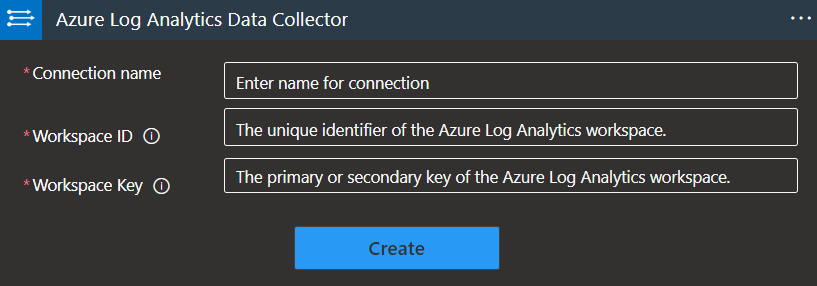
To grab those values go to ‘Log Analytics Workspaces’, find your workspace and go to ‘Agents’ under ‘Settings’:

Use those values to authenticate the ‘Azure Log Analytics Data Collector’ connection. The next step is to pass the output of the ‘Compose’ action to the ‘JSON Request body’ field:

The Logic App is ready. It reads e-mails from the ’email alerts’ folder, parses the body of those e-mails to JSON and then sends that data to a Log Analytics Workspace.
First test
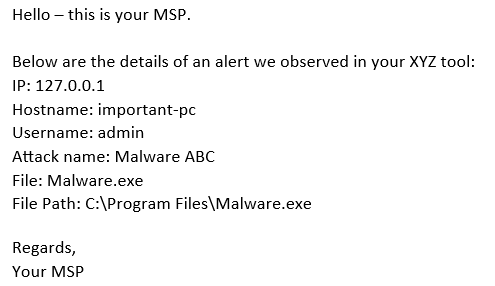
To test if the Logic App works we will send an e-mail that looks like this:
Subject:
Test security alert
Body:
After sending that e-mail and waiting ~5 minutes (may vary) we will see that a table in Microsoft Sentinel is created. Let’s query it:
emailalert_CL

Perfect. After getting that data to our workspace the two things left are to write a simple KQL parser and create an analytics rule to generate alerts based on emailalert_CL data.
Microsoft Sentinel content
6. KQL parser:
In this step we will extract data from the body_s table and break it down into multiple key – value pairs. The details on ‘parse’ command can be found here: https://learn.microsoft.com/en-us/azure/data-explorer/kusto/query/parse-operator – in short we’re looking to reference a string between and after the value we’re interested in. To parse out our e-mail we need to write a simple parser that looks like this:
emailalert_CL
| parse body_s with *
'IP:' IP '\n\n' *
'Hostname:' Hostname '\n\n' *
'Username:' Username '\n\n' *
'Attack name:' attackName '\n\n' *
'File:' File '\n\n' *
'File Path:' filePath '\n\n' *
After running this query IP, Hostname, Username, Attack name, File and File Path will be broken down into separate values:
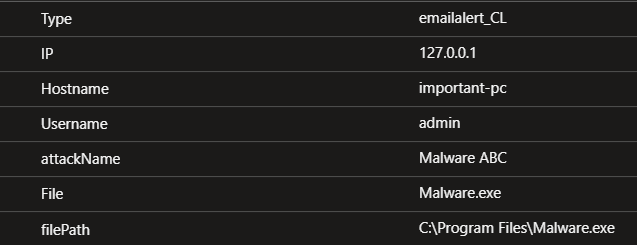
Our parser is now ready and we can move on to creating an Analytics rule.
7. Analytics rule:
Open the Analytics rule creation wizard. In the ‘General’ tab name the analytics rule whatever you want, I suggest this:
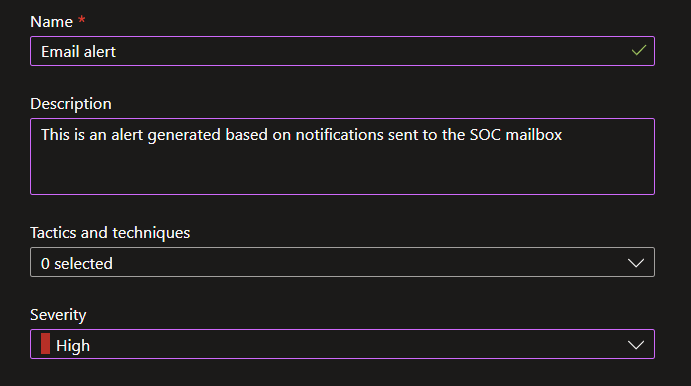
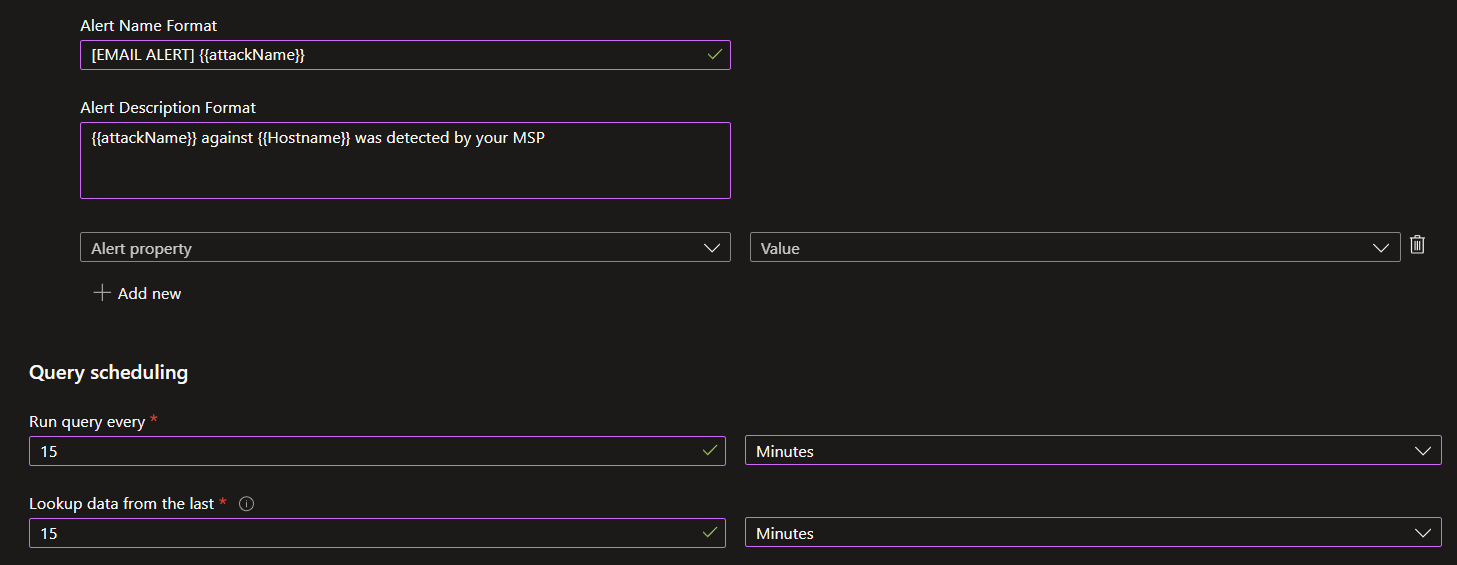
In the ‘Set rule logic’ portion paste the KQL from the above snippet into the ‘Rule query’ section. Then select the rule to run every 15 minutes and lookup data from the last 15 minutes. In ‘Alert details’ specify the following:
- Alert Name Format: [EMAIL ALERT] {{attackName}}
- Alert Description Format: {{attackName}} against {{Hostname}} was detected by your MSP
You can now create the rule.
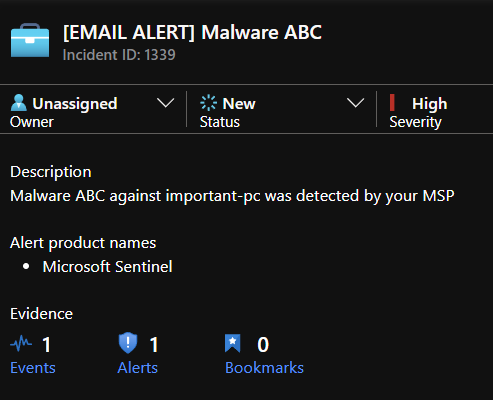
To test if the automation works as intented we will send the e-mail again:

After a short while we should see an alert pop up in our Sentinel queue:
Conclusion
This article explains how to create a simple automation that reads e-mail notifications from your SOC mailbox and creates corresponding SIEM alerts. I hope you can make use of this automation as well and if you do, leave a comment.


Leave a comment